Same guy- new name - new website!

You will be automatically redirected to the new address. If that does not occur, visit
http://InspiredRemodeling.com/blog
and update your bookmarks. Thanks! -Peter

Monday, April 12, 2010

Tile and Finish the Shower Floor Repair

I covered the basics of waterproofing a shower using the Schluter Kerdi system in my last post (click here). Now it's time to lay the tile and grout it all.

The goal of this project was to just to replace the bottom rows of tile and the shower floor. The older system was leaking and needed to be torn out (see this post). In addition to leaking, the old tiles weren't looking very good and some dirt had been collecting in areas that had been caulked several times in an attempt to fix the leaks.

The layout for the tile was already dictated to me by the original tiles that I didn't remove. I would be using a rounded base tile at the intersection of the bottom of the wall with the floor. This piece would get cut to fit after I installed the wall tiles.

In this case, I would need to start laying tile at the top and go down from there. If you start at the bottom, the weight of the tile is supported by the floor. Starting at the top, I had to tape each piece to the tile above so that they wouldn't slide down the wall and out of place.

One great thing about the Schluter Drain is that is a 4" square. It's perfectly sized for most tile installations where you are using either 1", 2", or 4" tiles. In my case, I installed 2" square white tiles by cutting out the center of one sheet of tile and installing this first (see the picture below). Then I installed all the tile sheets around the perimeter.


The small ledge across the bottom of the doorway is called the curb. It keeps the water contained in the bottom of the shower. I used some curved edge pieces of tile on the corner of the curb to avoid any sharp corners.

After grouting with white unsanded grout and sealing, this shower was ready for business. Hopefully, it will last for decades to come with no more problems.

HINT: John Bridge (Tile guy extraordinaire at www.JohnBridge.com) says that for a maintenance-free shower, take a minute after each use to wipe down the tile with a towel. This will greatly reduce any mildew over time and keep it cleaner as well.


-Peter


www.CarpentryGuy.com

Thursday, April 8, 2010

Waterproof the Tile Shower With Schluter Kerdi

What the heck is Schluter Kerdi???


It's a fairly new system for waterproofing showers that involves installing a membrane (the Kerdi) throughout the shower and over their special Kerdi drain. When finished you'll have a completely waterproof, sealed shower. In fact, it's so waterproof that you can install the Kerdi right over regular old drywall. That says a lot.

Let's look at how I installed the Schluter Kerdi shower system when I was repairing and old leaky shower pan liner that was decades old. In my last post (this link), I tore out the old tile down to the framing. Next, I replaced the subfloor with new plywood and added 1/2" Hardibacker on the walls. (Yes, I could have used 1/2" drywall, but I had the Hardibacker on hand...)

INSTALL THE PRE-SLOPED SHOWER TRAY
The older method to doing a shower floor included making a sloped bed of mortar that would direct water toward the drain. This needed more time, labor and expertise. For this shower, I used a Schluter pre-sloped shower tray. It's made out of some kind of foam and is easily cut to fit your particular shower.


After cutting the tray to size, I dry-laid it in place to mark the spot for the drain. Once the drain hole was cut out, I covered the floor with unmodified thinset mortar using a 3/16" v-notch trowel. The shower tray sets in this. You can walk around on it to make sure it's well embedded in the mortar. Just be careful not to crush it with your knees as you are working- it is foam after all.

INSTALL THE KERDI MEMBRANE
I'm not going to go through every detail of installing the membrane. If you are interested make sure to get the Schluter installation DVD and check out www.Schluter.com. The DVD comes with the shower kit and is great at showing every step along the way.

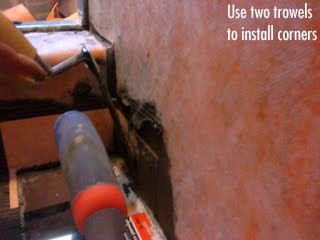
Basically, the membrane is installed over a thin layer of mortar and then flattened out and embedded using the straight edge of your trowel. The edges must all overlap by a minimum of 2". I started by using something they call Kerdi-Band in all the bottom corners. (It's just a thin pre-cut strip of the Kerdi material.)


It helped to have two trowels or a putty knife so you can hold the membrane in the corner with one trowel while you smooth out the other side with the other one. It's important to have tight square corners so that your tile will fit together correctly.

Once all the corners are done I installed larger pieces of Kerdi on the walls that overlap the corner pieces. Smooth them out to make sure there aren't any air bubbles underneath. Schluter also makes special corner pieces that a pre-formed to fit into corners and over the curb corners.

INSTALL THE KERDI DRAIN

The walls are done- let's do the floor. I covered the floor with a layer of mortar and then pressed the Kerdi Drain into place. The flange has openings that will help it firmly integrate into the mortar. I spread a little more mortar around the flange and installed the Kerdi membrane, making sure to fully embed it, especially around the drain.

That's it! Let it set overnight and we'll be ready to install the tile.

-Peter

www.CarpentryGuy.com

Tuesday, April 6, 2010

Redo a Tile Shower Floor- Tearout

Tile shower floors are nice, unless they are leaking! This is the case for a Nashville homeowner that asked me to repair their shower floor.

This was an old shower that was likely 40-50 years old. The way of installing a shower back then (and still today in some cases) was to first install a waterproof membrane that goes around 8" up the walls all the way around. Then, a sloped bed of mortar or 'mud' is installed before tiling the floor. A specific type of drain is used that makes a seal with the membrane.

Many people have the misconception that grout is waterproof. This is not true. Most of the water is deflected and just goes down the drain, however, a small amount is absorbed through the grout and mortar. When it gets to the waterproof membrane the water is funneled to the drain and through tiny 'weep holes' that send the water down the drain.

My guess is that the weep holes were clogged with this shower. This meant that the mortar bed was saturated with water and it was full enough that it was dripping over the top of the membrane around the sides. I saw evidence of this when I started removing the bottom tiles and water started pouring out from behind.

TEAR IT OUT
The homeowners didn't want to replace the entire shower and I can't blame them. This is expensive work. Instead I would just be tearing out the bottom few rows and installing a new waterproofing system called Kerdi from Schluter Systems. First, I had to get dirty.

Getting started was easy because many of the tiles were loose anyway and came right off. After that I went around with my hammer and a flat bar and busted out the tile. Of course, I was careful not to damage the tile above that I wanted to keep.


The wall tiles were set on a mortar bed containing wire mesh for strength. Below that was the black shower membrane that had to go. It all chipped away fairly easily exposing the thick mortar bed under the floor of the shower. This mortar didn't contain any mesh and broke apart into pieces that I could just scoop up and dispose of.

Finally, I had worked my way down to the subfloor that was wet and needed to be cut out. It wasn't long before I was looking into the basement and ready to start putting it all back together.

-Peter

Thursday, April 1, 2010

Finishing Up the Marble Floor and Steps

I knew when we were first talking about this bathroom project that there would be some interesting details to think about as we proceeded. Adding a set of winder stairs to a confined place in the bathroom was at the top of the list, especially when I heard that the homeowner wanted to cover them with marble tile.

STAIR NOSING
Though marble is a natural stone and is very heavy and durable, it's also somewhat brittle. For this reason it was very important to protect the tile at the front edge of the steps with a piece of Schluter trim. If we didn't do this, it would surely wear down faster or possibly break and crack because of the foot traffic to the back door.

Schluter trim comes in a wide variety of colors and styles depending upon what your using it for. It's great for making transitions from horizontal to vertical surfaces or corners where the appropriate tile trim piece is unavailable. The trim remains permanently flexible so it's great for corners that might otherwise crack over time with just grout or caulk.


You can see a sample piece of the trim I used in the picture. It's easily cut with a hacksaw and then set into the thinset mortar just before I lay the tile. The grout fills the seams between the trim and the tile and provides a very professional looking installation as well as some protection to our lovely marble steps.

MITERED CORNERS
Mitering is a term often used when doing trimwork that refers to cutting the trim at an angle (usually 45 degrees) where the corner pieces intersect. This can be done with tile as well and is most often used where there is an outside corner that is receiving tile. With these stairs, I used quite a few miter joints where the angled pieces came together.


A mitered cut on tile is not difficult provided that you have a tile saw that has this feature. My smallest tile saw is an MK 4" benchtop model and even it will cut miters by raising the cutting platform up to 45 degrees on one side. My larger Felker saw has an attachment that holds the tile at 45 degrees on the sliding tray which makes the cuts fairly simple once you get the hang of it.


The marble floor is grouted and sealed and ready for business. It will be slippery, though, so the homeowner will want to have plenty of rugs for wet feet. :)

-Peter

www.CarpentryGuy.com

Wednesday, March 31, 2010

The Beginning of a Marble Bathroom Floor

After adding a bathroom to this home (see these posts) by removing a closet and raising the floor, I had two small stairways to consider finishing. One, in the hall to the den, received pre-finished red oak hardwood flooring (this post). The bathroom, with a set of winding stairs to the back door, would get marble tile.

When I think of marble tile I think of luxury, like a Roman bath from ancient times, right? I guess that was the idea here as well. The homeowner picked out a black marble that had accents of yellowish-green throughout. I always enjoy using stone materials because of the amazing colors and hues that naturally occur in the rock. Most of the time it's covered up with dirt, but now we get to put it in our homes and enjoy it!

Using marble isn't that much different than any other tile, except that the framing does need to be stronger to support the stone material. I had this in mind as I framed the floor so there were no concerns with this on this project.

Stone tiles, like marble, slate, travertine or granite also call for a different kind of thinset. Be prepared, it costs nearly double the price of the cheap stuff! This is not the time to skimp, if I'm going to all this trouble to install flooring, I want to make sure I do everything possible to keep it looking great for many years.


I started by installing Hardibacker cementboard throughout to provide a solid foundation that would not be susceptible to expansion or moisture absorption the way plywood would. It goes down over a layer of thinset and is nailed throughout with galvanized roofing nails.

By far, the trickiest part of this project was how to approach the winder stairs. They were to be tiled all the way down to the backdoor. We would also be doing a 6" marble 'baseboard' all the way around the room on the walls. The tiles were 12" squares so I cut them in half to use as the wall tile.

A heavy-duty professional tile saw is really useful for cutting stone tile like this, especially if you need straight cuts!

In order to not 'tile myself into a corner' I needed to start at the top of the steps and make my way down and out the back door. I used a tile spacer on the treads while I placed the tiles on the risers and taped them in place. Then, I could take the spacer out and install the tread tiles as I worked my way down.


I gave quite a bit of thought to the layout because I didn't want any weird grout lines going down the steps. I preferred to have a whole piece at the top of the steps and was able to achieve this without having any tiny pieces around the edges of the room. In the end the layout worked great, even with those crazy steps!

To be honest, the steps took extra time to cut and install, but it was a blast! I enjoyed the challenge of making them durable and safe as well as looking great.

Tomorrow, I'll cover a couple other details that were unique to this installation- stair nosing trim, and the mitered corners.

-Peter

www.CarpentryGuy.com

Tuesday, March 30, 2010

Work Outside Rain or Shine with a Canopy

With the spring rains coming, I new that I would need to get some weather protection or I would start getting rained out and my project would get off schedule. Nobody wants rain delays so I started looking into getting a small roof over my head, a.k.a. a canopy.

I was surprised to find so many offered. Most of them are called tents or 'wedding canopies' because they are most often used for outdoor parties. I just wanted a place to set up some tools so that I could still work, unless it was really storming.

I settled on the 10 x 10 Smart Shade canopy from Swiss Gear. They are the same folks that make Swiss Army Knives and their stuff is usually higher quality so I went for it.

I wasn't disappointed.

One day last week I needed to finish some trim and a light rain was forecasted all day. Time to give it a try! There was a break in the weather and I got it set up all by myself fairly quickly, probably less than 15 minutes. It would be easier with two people, but I was able to do it by going around and moving the legs out a little at a time. It didn't take long and I had a roof to keep me dry. It also came with a nice case that even has a couple wheels on it too.

I'm completely pleased with the purchase and thought I'd share in case you were considering one as well. I must admit that at first I felt like I was taping a TV show because they are always working under tents like this... :)

BTW- I'm also planning to use this as the summer starts heating up. I know I won't mind a little shade to keep me working with a smile.

-Peter


Tuesday, March 23, 2010

Open Up The Kitchen Please!

Sometimes the biggest changes to your home aren't the most expensive. For example, you could spend $10k remodeling your kitchen and upgrade everything and still feel cramped in a small room. For these homeowners in the Brentwood area, their budget was much lower, but the change was remarkable.

The split-level home was built with a kitchen wall that divided the kitchen from the living room. The problem was that the wall seemed to 'stick out' and make the rooms feel too divided. The homeowners also wanted more room for setting up a large dining room table for family gatherings. The solution was to remove part of the wall.


Unlike a couple of my other recent projects, this wall was load-bearing, supporting the ceiling joists from the two adjacent rooms. This meant that I would have to carefully build temporary walls along each side before tearing out the old framing and putting in a beefy 2x10 header. The header would extend all the way across the space to the outside wall. To save a little money, we decided to leave the header exposed and covered with drywall than to cut out ceiling joists and conceal it in the ceiling.


There was very little trim to do because I finished all the edges with drywall, however, I did make a small shelf for the serving window out of nice piece of 1x6 poplar. I notched the ends so that the board would seem to extend wider than the opening and give the effect of a window sill.


After removing around 32" of the wall, there was a little bit of hardwood flooring to patch in. It's always tricky to match the color of 50 year old hardwood floors perfectly, but this one seemed to blend in well with a coat of "natural" stain on some red oak.

The change made an incredible difference in this kitchen which now seems more integrated into the living room and ready for family!

-Peter

Saturday, March 20, 2010

How To Install PreFinished Oak Flooring

It's time to install the hardwood flooring in the hallway outside the new bathroom that I added to this home in Donelson. The homeowner wanted to match the hardwood in the rest of the home as much as possible so he picked out some pre-finished 3/4" red oak flooring for me to install.

The process for installation is very similar to installing unfinished hardwood. Here are the basics:


PREPARE
Before you begin, get the hardwood ahead of time and let it acclimate to the humidity inside the home. It's important to have a flat and solid subfloor to install the hardwood over. Over the subfloor I installed 15 lb felt paper underlayment across the floor, making sure to overlap the courses by several inches. Staple it down in a few places and make sure there's not anything trapped underneath that will make a 'hump'.

LAYING THE FLOOR


It's time to install the first piece of hardwood. Measure out from the starting wall and make a chalk line. It's good to use the straightest or longest wall as your guide. In my case, I wanted to make sure the line was parallel to the bathroom wall where I would end up. Select the longest pieces that you have and face-nail the first run in place all the way along your chalk line. It's important that your first piece is straight because it will be the guide for the rest of the flooring.

What's FACE-NAIL? Face-nail means that you nail through the 'face' of the board or the top where it will be seen as opposed to most of the flooring that will be nailed through the tongue so the nails are hidden.

Before I start laying the rest of the flooring I like to sort a batch of it by length. Usually, I would sort a couple cases at a time. You can see in the picture how I would divide it up. This just makes it easier to grab the pieces that I need without sorting through a stack of lumber each time.


With the flooring organized, grab one of the longest pieces and then a series of pieces that are each 6-8" shorter. When you lay them out like the picture above, it will stagger the seams as they are installed. By the way, if you are working with a helper, one of you can organize the stacks and pull the right wood while the other person nails it down.

Here's a trick to measuring the pieces that need to be cut: Take a piece that's approximately the right size (from the well-organized stack, right? :), and flip it around so the tongue is on the wrong end against the wall. Then you can just mark the length on the piece where it needs to be cut. This method will save you having to use a measuring tape for this cut and it will go a little quicker.

For each piece of hardwood, I started at the end where the tongue is and used a small block to make sure the pieces are super-tight. The block is a small piece of flooring with tongues and grooves. Using this prevents damage to the pieces I'm installing. Nailing through the tongue with my angled finish nailer, I work my way toward the other end, using the block as I go to make sure everything is tight.

NOTE: When installing a larger area of flooring, you'll want to use a special flooring nailer. It's better in two main ways: 1) It uses special flooring nails that have 'teeth' on them that makes a very strong bond and 2) It shoots the nails when you hit it with a rubber mallet. The force of the mallet ensures a tight fit while you're nailing.


As you get closer to the wall, you won't have space to use your nailer so that last three courses or so will need to be face-nailed. To get a tight fit, I like to use a couple blocks and then use a small flat bar to pry against the wall and squeeze the pieces together. Make sure you don't pry directly on the pieces you are installing!

The last pieces will likely need to be ripped on the table saw. Consider how wide the baseboard trim will be so you don't have a gap left later.

One of the noticeable differences between prefinished flooring and unfinished flooring is that there will be slightly more imperfections. Before an unfinished floor is sanded and sealed, the small gaps will be filled with woodfiller to hide them. There's also a difference in the quality of some of the brands of hardwoods. The differences are in how well they are milled to fit tightly together. The low-quality (cheap) brands will probably have more gaps because the milling wasn't as good.

I'm not one to tackle installing a whole house of hardwoods by myself, but this hallway was a lot of fun. Mainly, it's just cool to work with finished wood and see the amazing colors and designs in the grain. It looks great and it will last for many decades and more...

-Peter

www.CarpentryGuy.com

Thursday, March 18, 2010

Now for the Oak Steps

When I added a bathroom to this home in Donelson I raised the floor from the den to match the rest of the home. That meant that there would be three steps to build going to the den (see this post).

The homeowner has decided to have me add hardwood flooring to the hallway, but before I do that, I need to install the oak treads and risers on the steps.

There's usually a section at the home stores where they sell all kinds of stair parts like the treads, risers and balusters in basic red oak. That would have worked fine, except that these steps were 51" wide.
To find the wider cut treads and risers I went to JeffCo Flooring downtown. It's the super-secret place where the pros shop for hardwood flooring, including stair parts. They had just what I needed.


I started with the bottom riser and worked my way up. These steps will not have any trim on the sides to cover any gaps so I had to be exact with my measurements. I usually cut the pieces a little long and trimmed it to make sure it fit well. I put it all together without any fasteners and then took all the pieces outside for a good sanding.

Some people finish the wood before installation, but I like to install them before I finish. After a healthy dose of liquid nails, the treads were nailed in place with the risers. The top step gets a piece called stair nosing that is rounded on the front, but the back has a groove where the end-tongue from the flooring will fit. The stair nosing is sold by the foot, so you can just buy as much as you need.

I put a little painters tape on the wall to keep from making much of a mess and then applied the stain. These steps were stained with a Minwax color called "Natural". It's nearly the same as just using a clear coat, but I thought it was a slightly better match to the pre-finished red oak flooring that the homeowner wanted to install in the hall.

Letting it dry overnight and lightly sanding between coats, the steps will get two more coats of polyurethane after this stain.

Next comes the hardwood flooring...

-Peter


Monday, March 15, 2010

Inglewood Cottage Kitchen- Before and After

The kitchen at my Inglewood Cottage project needed some creativity to get to the shape it's in today- fabulous!!

(Professional photos by Zach Goodyear.)

Here are some of the challenges that were overcome:
1. Open the wall up between the kitchen and dining area and make it an arch to match the other doorways in the home (this post).
2. Make a spot to install a dishwasher next to the sink (this post).
3. Add counterspace on the wall next to the range where there previously was none.
4. Build a cabinet next to the dishwasher and over the range to hold the new hood (this post).
5. Level the floor around the back door (this post).
6. Make it all look like it fits with the character of the house.

I'd say we accomplished our goals.


The old kitchen had some good parts, namely, the cabinets. They were build to last and there was no reason to replace them. Instead, everything else is new- floors, counters, backsplash- but the cabinets just got some fresh paint and new hardware. Actually the cabinets are probably better built than many of the budget cabinets available today.

The subway tile backsplash is one of my favorite parts of the renovation, as well as the cabinets I got to build for above the range and next to the dishwasher. Nothing fancy, but it was fun to build a new cabinet and try to make it match the old so well that you wouldn't think it was new.

In addition to the cosmetic changes, the kitchen also got all new wiring and plumbing. It's ready for business!

By the way, when we got finished the homeowners listed the home for sale on a Friday and had it under contract before the open house on Sunday! Wow! I new it would get some attention, but that's an amazing story, especially in our current real estate market.


Check out all the articles related to this project at this link.

-Peter