Same guy- new name - new website!

You will be automatically redirected to the new address. If that does not occur, visit
http://InspiredRemodeling.com/blog
and update your bookmarks. Thanks! -Peter

Tuesday, March 31, 2009

Fantastic Fireplace Facelift

Everyone loves before and after stories, so I thought I show some pics of the fireplace at our East Nashville project. We started with the common story- broken & cracked tile, overpainted mantle and bland.

When we were done it was one of my favorite parts of the house, even though the fireplace wasn't functional. It was still a nice centerpiece to the living room.

We started by removing the mantle. At first I thought we could strip and stain it, but after getting started, I'm not sure that the wood was worth the trouble. I used my wood scrapers to clean out much of the paint and get it looking sharp. After sanding we painted it with the brown trim paint that was an accent color for the house. (I love that color, but you don't want to overdo it!)

The tile was the really fun part. The old wall tile came off in huge chunks. I built a new support system for them with 2x4s and cement board. This was tedious because the depth had to be exactly right so that once it was tiled the mantle would fit over it right with no gaps.

The hearth was easy- I just filled in the holes with floor leveling cement and tiled right over the old tile. This made a new surface that was raised a bit from the floor, but that was fixed by adding some trim around the edge that was stained to matched the hardwoods.

I found this incredible tile at the Habitat Store in a mixed lot. I had been saving them a long time waiting on just the right project to use them on. They are Italian ceramic tiles in different sizes. I tried a few different patterns until one worked. I used smaller squares around the outside and put the larger 12x18 rectangular pieces for the hearth.

You can't use it to burn anything except candles, but it looks great.

-Peter

www.CarpentryGuy.com

Monday, March 30, 2009

Save Your Home with Gutter Extensions

No, that title isn't melodramatic. I'm serious!

I've seen hundreds of homes where gutter problems over the span of a few decades have practically ruined the house. The purpose of gutters is to collect that rainwater and get it away from the house. However, so often the downspouts just deposit the water right next to the foundation.

Having all this water next to the foundation will eventually lead to loads of expensive problems from either the settling of the structure or the moisture getting into hidden areas and causing rot and/or mold issues.

The sad thing is that the fix is super-easy. Just add a gutter extension onto your downspout and get the water away. The one in the picture is expandable and found at most home centers for under ten bucks. It will fit either the large or smaller downspout sizes and comes in brown & white.

When you install them, make sure you attach them with some gutter screws to hold them in place. Otherwise, a big rain is sure to loosen them and eventually, you'll be without your all-important downspouts extensions again.

Even if you have a professional gutter installation or live in a brand new house, you should check to see where the water ends up. Home builders often leave the gutter extensions for you to fool with, although every good home inspector will look for this and comment on how well the water is directed away from the structure.

Think of it as your home's first line of defense against the elements. In my opinion, it's a no-brainer.

-Peter

Saturday, March 28, 2009

Use a Studfinder to Nail with Confidence

If you haven't added a studfinder to your toolbag, now is the time. The days of putting eight holes in the drywall before you locate the stud are over.

There are numerous occasions when a studfinder is invaluable. For instance, the other day I was installing crown moulding in a finished room. With the studfinder I was able to locate a place to nail so that the crown doesn't sag later like it did at the house from this post.


It's also helpful when hanging heavy objects or installing a bookshelf or even a baby gate that you want to hold when the kids are climbing over it. :)

Basically, you just press a button the studfinder and slide it across the wall. When it finds a stud it lights up and even has a beep to alert you. As you can see in the picture, they are so easy to use so that even my 4-year-old could go around the house finding studs.

I've got a Zircon StudSensor SL, which is a fairly baisc model that sells for around $15 at Home Depot. There are some that get quite fancy and also find live wires within the wall and other hidden items.

Next time you want to hang a heavy mirror or bookshelf that won't give you the drop, make sure you find the studs first.

-Peter

http://www.carpentryguy.com/

Friday, March 27, 2009

Basement Retaining Wall Repair

Old homes are notorious for having basement and crawlspace problems. Most are related to water entry for various reasons. Our East Nashville fixer was no exception. It had a basement window on the side of the house where water was definitely getting in and eroding the basement walls, which were just dirt. From the picture you can see how bad it was around that window.


Basement & Crawlspace problems usually have a two-fold solution:
1) Stop the problem from getting worse
2) Repair the damage

If you do one without the other, you'll still have problems.

For our situation, the fix involved first diverting the water from the house by re-grading the outside and build up the window-well a little better. Then we could work inside to re-support the structure in the weakened area.

The grading was easy- I had my cement guy do that when he was regrading the backyard. For whatever reason, the yard was sloped toward this window. We added some bricks to make the window well a little taller and then graded the yard so the water would run away from the house. This seems obvious, but there are tons of houses out there with this exact problem!

My job was to handle the inside repairs. My plan was to build a block retaining wall to support a couple short jack stands. A short wall was already present so I would just extend it up. The new wall would then carry most of the weight since the outside wall was damaged.

I filled behind the wall with concrete all the way up to the foundation so that the dirt wall would be supported and the foundation wouldn't move anymore. Then, I replaced the window covering with new plywood and caulked it well. In the end, it looked much better and was quite dry the next time it rained.

Dry basements are a good thing.
-Peter

Thursday, March 26, 2009

Give the Tree a Crew Cut

I get to do all sorts of work for people. As an odd example, last week I got to trim an apple tree for some of my favorite clients. I'm not sure the tree had ever been pruned.

You can see how overgrown it was from the picture. Most of the green that is visible is actually three very healthy vines that were tangled throughout the tree. Many of the upper branches had broken because of the weight of the apples. In addition, it was made up of 6-8 large trunks that were twisted all over the place.

Anyway, it was hard to know what to save. I cut out the broken pieces and the branches that were twisted into the tree as well as any that hung over the fence onto the neighbors yard. It didn't leave much.

It will take a few years of new growth to look normal after this major surgery, but in the end it will be a healthier tree that will produce plenty of fruit.

-Peter

www.CarpentryGuy.com

Wednesday, March 25, 2009

Beadboard for Your Porch Ceiling


I've replaced a couple porch ceilings on older homes and I love the look of beadboard. Often, I've seen people just throw some normal plywood up there, but beadboard is a great touch that is fairly simple to install and keeps the older look of the home.

The porch in this picture was actually not original to the house. The homeowner had the roofing contractor add them for weather protection and to improve the curb appeal of the home that was basically a small box with little character.

I was commissioned to finish the trim on the porches and wanted the beadboard look without the expense of purchasing actual beadboards. To do this, I like to use the plywood beadboard that is sold at Home Depot and other home centers. I much prefer the type that is real wood as opposed to the thin paneling that they also have.

The wood variety is stainable and much easier to work with. In addition to this, the edge is designed with a lip so that the peices overlap. This hides the seams as long as you don't have any butt joints to deal with.

The plywood beadboard will cost you under $20 a sheet, a little more than the cost of the paneling variety, but I think it's totally worth it. The cheap stuff tends to look cheap when you're done in my opinion and it's nearly impossible to hide the seams without covering them with trim.

This is also a great product for wainscoating in a bathroom or sunroom.

-Peter

www.CarpentryGuy.com

Tuesday, March 24, 2009

Caulking Basics

Today I was helping some homeowners in the Courtside subdivision in Brentwood. They have their home on the market and wanted to take care of some trim joints that need re-caulked after a few years of humidity and possibly some settling. They had beautiful crown moulding throughout the entire home, but most of it looked like this:


I thought I'd cover some of the basics of how I handle caulking. First, it helps so much to have a great caulk gun. The last time I bought one I splurged and bought the heavy duty one. Boy, am I glad that I did!

For one, the handle is solid so it will never bend from use. There's nothing more annoying than a cheap bent handle on a caulk gun! :) It also has a clipper to take off the end of the spout as well as a little 'poker' to break the seal with. No more searching through the nail pouch for something else to break that seal.


Basic Steps to a Good Caulk:
1. Make sure you have the right caulk for the job. It amazes me how many types there are, but they are designed for a specific purpose and it's best to use them accordingly.

2. In addition to the caulk gun, I take a roll of paper towels, an old cardboard box, and my index finger.


3. For trim caulking, I trim off less than 1/4" of the spout. Any more, and you'll likely have way too much to deal with.

4. Use the least amount of pressure on the handle to get the caulk you need out. If you over-squeeze too much will come out again. The key is to stay in control of the caulk... Run it along the joint.


5. Use your finger to smooth the caulk into the joint and remove the excess. Wipe your finger often with paper towels to keep it relatively clean. This is key to not making a mess. Plan to use lots of paper towels. For tight spots like inside corners of crown moulding, I take some fresh paper towel to get the excess out and make the joint look sharp.


6. Use the cardboard box to deposit the used paper towels or to set the gun down. This is mainly important if you're in a finished space like I was today. You don't want to accidentally leave a pile of caulk on the carpet.

BIG TIP OF THE DAY: After you apply your bead of caulk, quickly hit the 'switch' to release the pressure on the caulk tube. This is the secret to stopping the caulk from coming out when you don't want it to. Before I figured this one out, I'd waste more caulk than I would use. Now that you know the secret, I guess you're in the caulking club.

There's really not much to it. Like anything else, take it easy and watch where you point that gun.

-Peter

Monday, March 23, 2009

Painter's All-In-One Tool

After yesterday's post about carefully removing trim, I thought it would be appropriate to highlight another tool that I always have with me, a painter's all-in-one.

It looks like a fancy putty knife, which is actually a fairly accurate description. It has a stronger blade than a typical putty knife, though the blade is thin and sharp. I like that the butt end of it is reinforced so I can hammer on it without hurting the handle.

At the store, these are often called things like painter's 5-in-one, etc. I think that mine actually said it was a 14-in-one or something ridiculous like that. You can get a 7-in-1 on Amazon here for under $6.


Anyway, in addition to loosening trim it's great for:

1. Scraping old caulk off of trim for reuse
2. Scraping off peeling paint
3. Applying leverage to trim to make tight joints (like crown moulding)
4. Pulling some nails
5. Sharp curve can cut linoleum and rigid insulation (see this post)
6. Anything you would use a putty knife for- glazing, applying wood filler
7. Opening windows
8. Bottle Opener
9. Lots more, be creative here

Get your own, I'm hanging on to mine!

-Peter

Sunday, March 22, 2009

How To (Carefully) Remove Trim

There are many times when trim needs to be a removed for a project, but saved and possibly reused. Trim often breaks easily or gets damaged when removed. Here are some steps to take that will help:


1. Start by using a utility knife to cut along all of the edges of the trim. This will sever the caulking and allow the trim to come loose. Otherwise you'll likely damage the wall or the trim itself because the caulk adheres so well.


2. Next, I like to use my painter's-all-in-one tool, which is like a fancy putty knife, to pry the trim from the wall. It is much thinner than a pry bar and less likely to damage things. This tool has a ton of uses, but I've found nothing better for getting trim off without causing trouble. Once you get it loose you could use a pry bar in some places. Just be careful not to pry against the drywall where there is no stud because this will quickly put a hole or indention in the drywall.


3. After the trim is off get some end nipper pliers to get the nails out of it. DON'T use a hammer to beat them backwards, instead, use the pliers to pull them from the back of the trim. This way, the front of the trim is not damaged whatsoever. It will be ready to put back up with only the new nail holes to cover, not the old ones as well.


4. Finally, label the trim on the back so you'll know where it came from. This will be especially helpful if you have several pieces that look alike. It will save you from having to play the trim-matching game later.

-Peter

Saturday, March 21, 2009

Don't Do Casing Like This

Yesterday, when I arrived at a job to do some trimwork I found some very creative door casing to fix. A homeowner had wanted to 'dress up' the rooms a little so they installed decorative fluted casings with rosettes. It wasn't bad except that they put the plinth blocks above the baseboard! (see the picture)


Casing is a term used to describe the trim around a doorway. There are many varieties dependant upon the style and material used.

Plinth Blocks are the decorative piece sometimes found at the bottom of door casings that simulate the base of a column. They should be installed flush to the floor and butt up to the baseboard.

Correcting the casings was no simple task, because it involved taking all of it off and removing quite a bit of baseboard. Thankfully, it wasn't every doorway in the house, but only about 4 in the main living area.


In my next post, I'll talk about the best way to go about removing trim without causing more harm than good...


-Peter


Magnetic Drill Bit Holder & Guide

Here's a tool that I really hate to be without. It's an extension that holds hex screwdriver bits. Since it's magnetic, screws 'stick' to it and don't fall off. It helps so much when you're trying to drive a screw and your other hand is not free (which is most of the time).

I learned how dependent I've become on this simple device when I was using a friends drill the other day and he didn't have one. I kept expecting the screws to 'stick' to my driver tip but they kept falling off on the ground. It was a headache.

There's one more awesome thing about this tool. The sleeve on it extends forward to further ensure that the screw is guided into place. I like to extend the guide and then rest it on one of my fingers while I'm driving the screw. The guide won't spin, but will allow the driver to spin and drive the screw.

I found these online for $5-10, but there are probably some out there for even less. Anyway, it's worth every penny!

-Peter

www.CarpentryGuide.com

Thursday, March 19, 2009

No More Rusty Gutters

Today a homeowner was telling me about her gutters that were completely rusted through. It was a beautiful day so I thought I would tackle the job for her. After I got the gutters down I took a picture of one of the holes (You can see grass through that hole!):


Gutters are one of your home's main lines of defense against water entry and damp foundation problems so if you have gutter issues, it makes sense to take care of them before the problems multiply. For this project, I just replaced the ones on the front of the house. The supplies for the project were under $300 for about 45 feet of gutter and two 18 foot downspouts and all the trimmings.

I got finished just before dark so the picture isn't great, but it turned out well. The real test comes with the next rain.

-Peter

Wednesday, March 18, 2009

Carriage Doors for the Garage

Today was a beautiful spring day and I got to spend it outside building some carriage doors for a garage in East Nashville. The home is mostly finished and we've turned our attention to the old garage in the back that has been neglected over the years.

The garage door was ancient and didn't work so the homeowner removed it and wanted me to building some Carriage-type doors like I did for my Eastside Bungalow Project. The rough opening was right around 8 foot across.

Here's what we were starting with:


We began by tearing out the rotted door jambs. I ripped some larger lumber we had on hand down to around 5 1/2" and used it to build some new jambs. One side needed some shims but otherwise the opening was amazingly level and square, which is a necessity when you want the doors to work right.

With the jambs installed we created the doors out of a 2x4 frame and plywood. We hung the doors with large gate hinges that are designed to hold this much weight. I also replaced the trim around the door that had expired long ago.

Once the doors were both hung we had a small celebration (it's always great when they fit without much trouble!) and worked on adding some trim. I attached a 1x4 trim board to one door that would cover the gap between the doors and hold them together tightly. Then, I ripped the rest of the trim boards in half and used a design that mimicked the 3 over 1 windows that are common throughout East Nashville, and many homes from this time period.

The finished job looked great, but I can't wait to see it after the homeowner gets the paint on there. The doors will be a dark Starbucks-type orange color with pure white trim. I'll try to remember to add a picture later.

If you've got an old rotted shed that needs repair, give me a call. We'll make it a carriage house!

-Peter

www.CarpentryGuy.com

Tuesday, March 17, 2009

No Shocking Light Fixtures!

In prepping a room for painting this week, I loosened a light fixture so I could paint under it. As I got a look at the wires to this light, I saw that a couple of them were badly damaged and it appeared that bare wire was actually touching the light fixture!

This is bad, especially since the light was not grounded either. Here's a couple pictures:

We replaced the light with a newer, identical fixture that had sleeves to protect the wire as it went through the metal base. Something that this older fixture sorely missed...

-Peter

www.CarpentryGuy.com

Monday, March 16, 2009

5 Tips for Sanding Drywall

After spending so much time getting the walls level and square and dreaming about the finished room, don't skimp on the drywall step in the excitement to get the paint cans out.

It's sometimes hard to wait, but it's worth it to make sure that in the end the project looks great and not rushed because of bad drywall finishing. After you've applied the joint compound (see my sand-once process here), considering these tips before you jump into sanding drywall.

1. Start by preparing for dust control. Sanding stirs up a lot of dust. It's a pain, but there are things you can do to at least help keep it under control. First, put plastic over anything in the room that you don't want to clean or just remove it from the room if possible. I also like to put plastic over the doorways and the tape them shut. Also, and this could be a biggie, turn off the HVAC! Otherwise, the system will take the dust from the project room and spread it throughout the entire house. (Homeowners don't tend to like that, and you won't enjoy cleaning it all up... :)

2. I usually just use a little handheld sanding tool with a 9" x 3.25" sheet of 100-120 grit sandpaper. Resist the urge to use an electric sander. I've heard of people trying this. If you need power tools then you've applied too much joint compound! Power sanders are too difficult to control and likely to do more damage than help.

3. Before you finish, grab a handheld utility light and shine it on your work from different angles. It's amazing how this will reveal spots that need a little more sanding that were otherwise hidden from the room light. If I skip this, it is much more likely that miss a small ridge or indention that could have easily been sanded out.

4. Don't overdo it! This is especially important around the taped seams. You don't want to sand into the tape because that will mean that you have to get out the mud again.

5. Take the time to do it right. That last one pretty much applies to anything that we do.

-Peter

www.CarpentryGuy.com


Sunday, March 15, 2009

New Paradigm for Drywall - Sand Once!

I first learned the 'correct' way to finish drywall from a fold-out flyer in an older This Old House Magazine. Their suggested process was to do three layers of joint compound, each one applied with a progressively larger knife, and sanding in between each one.

I followed this process for my Eastside Bungalow Project and it worked well, however with all that sanding, and drying time, it seemed to take forever to finish the drywall.

Lately, I was working with a veteran carpenter who showed me a new way that has changed my drywall life. The amazing thing is that you only sand once, and if you do it right, there won't be much to sand at all!

I thought I'd lead you through the steps as I finish up the ceiling on the Sunroom Repair Project.

THE PROCESS

First Application- For the first application the idea is to get the tape to bond well. You only use the 5" knife (and maybe the corner knife) for this coat. For most joints, apply a thin 5" swipe of mud. Then put the tape over that and use the knife to press the tape down well and remove the excess mud, fanning out the edges. You don't have to fully cover the face of the tape, we'll do that with the second application. The most important part of the entire process is to "make the edges disappear". The middle of the joint will get built up, but the edges must be completely smoothed out.


(BTW- I know these pictures aren't great. It's difficult to capture drywall detail with my unprofessional camera, a.k.a. cell phone... :)

Second Application- Once the first coat is dry you may proceed to the second without sanding. For the second coat you will only need the larger 10" knife (unless you have tight spots to get into). This is called the "Build Up" coat. For this we use a liberal amount of joint compound and apply to both sides of the joint so that it ends up at around 18" wide or so. Butt joints will take more where tapered seams won't need as much.

Again, you want to make the edges disappear, but the center over the tape will have a decent amount of mud on it. When done correctly you'll have a small ridge in the middle where your knife swipes overlap. Having plenty of mud over the tape ensures that you won't sand into the tape later. Of course, you want the mud as smooth as possible without bubbles or whatever. Remember, if you apply too much, you'll just have to sand it off and that's a lesson you won't soon forget...


Third & Final Application- The second coat will take the longest to dry, but when it does you can move the final coat. For this I just use the 6" knife again. This is called the "Thin Coat". I like to apply the mud in a couple thing swipes parallel on each side of the joint. Then I wipe nearly all of it off, again making the edges disappear. The small ridge in the center from step 2 will be the high point, but this coat will smooth out any remaining valleys that are left.


This last coat will dry fairly quickly and you'll be ready to lightly sand and finish up. I'll try to address a couple sanding tips with my next post.

-Peter

www.CarpentryGuy.com

Saturday, March 14, 2009

Copper Connections- No Leaks!

Today I helped a friend finish up the plumbing in a house he's renovating for resale in East Nashville. We had earlier removed all the old plumbing in the process of moving the floor plan around a little to make the small 600ish square foot space more livable.

We decided to mix copper and PEX pipes, using 1/2" copper from the fixture to the crawlspace, and 3/4" PEX to connect the lines beneath the floor. We did this because we wanted the rigid copper studs to connect our fixtures to later, but down below it is much easier to use the flexible PEX with the amazing Shark-Bite fittings to connect it all together.

Today I was finishing up the copper soldering for the shower. Copper hot/cold lines came up through the floor for the laundry in the same place so we just jumped off of these lines to run supply lines to the shower.

With that finished, it was time to finally turn on the water main and see how we did. Even with 20-25 soldered joints, no copper leaks were found. This is always good to hear, especially since it's usually difficult to test them until they are all done and ready to go.

We did find a couple PEX joints that hadn't been fully assembled. In case you're new to PEX, here's a tip: before sliding the PEX pipe into a Shark-Bite fitting, make a mark on the pipe with a Sharpie marker about 1/2" from the end. This will give you a reference point so that you know that the connection is fully made. Especially with white PEX, it's hard to tell if you've pushed them together without this mark. Thankfully, with a little squeeze, it's an easy fix.

-Peter

www.CarpentryGuy.com

Friday, March 13, 2009

Installing a Simple Light Fixture

The other day I was installing some light fixtures for the studio I was working on in Brentwood. Installing a light fixture is not (usually) a difficult project, but can be one of the most rewarding and effective ways of updating a room's decor.

The first step is always to locate the correct circuit breaker and make sure the power is off to this circuit. I like to double check this with my tester as well as making sure the switch is off.

With the power off, I stripped the wires back (FIG. 1) and unpacked the light. They will usually come with all the hardware and screws that you will need for a typical installation, that is, except easy-to-understand instructions. :)


The next step was to install the mounting bar (FIG. 2) that screws into the electrical box. There is a threaded post in the center that will slide through the light's back plate and then get a nut to hold the light in place.

With the mounting bar ready, it's time to make the electrical connections (FIG. 3). For a basic installation, this is pretty simple. There are three wires in both the box and light fixture: black (or hot), white (or neutral), and the copper wire which is the ground.

I like to connect the ground wire first. On the mounting bar is a small green screw. This is where you attach both of the ground wires. I like to twist them together first and then tighten them around the screw.

Next, I connect the white wires together with a wire nut. (These are often provided, if not, they are available at any hardware store.) Then, I do the black wires. That's it for the connections. You want them to be good and tight so that they won't come loose.

At this point, I gently push the wire connections further into the box and slide the light fixtures base over the mounting post. This is threaded so that you can adjust it to make the fixture tight to the wall. Put the nut on to hold it there.

Next, all I needed was a light bulb and then I could finish the installation. This was a wall light so the shade just hung from the light's base. With ceiling fixtures there are often small screws to hold things together.

These particular fixtures were handmade out of cherry wood in Montana by a company called Cherry Tree Design. They look great!

Different installations may include variations on this basic process, but it's not usually much more difficult than that.

-Peter

http://www.carpentryguy.com/

Thursday, March 12, 2009

New Roof For a Sunroom

With the Skylight doomed for removal and the rafter framing finished, (yesterday's post) it was time to head up to the roof to start taking apart the flashing and see how much sheathing needed to be replaced.

The window came off quite easily because, of course, it was rotted anyway. The weather was cold and potentially rainy, so I worked in small sections that could be covered if needed. After covering the window opening with 1/2" plywood I started tearing off shingles on the half of the sunroom that seemed spongy.

After removing the shingles it was clear that I needed to replace more sheathing. I used every bit of the 4x8 sheet that I had on hand. I took off the rest of the shingles with my handy roofing shovel (an unusual tool that you won't use much, but will be glad to have when tearing off shingles) and put down 15 pound underlayment or tar paper.

To match the rest of the house I used 25 year 3 tab shingles. They went on smoothly, though I was getting chilled to the bone on the roof in the cold weather we were having.

With the roof finished it will be time to head inside and replace the ceiling drywall and patch things up right. I'm so glad that I got the roof finished yesterday because today had a wind chill of 28 degrees with hail and sleet! Great weather for cleaning up shingles from the backyard, right? :)
-Peter

Wednesday, March 11, 2009

Skylight Leak Oh My!

Skylights have gotten a bad rap as being a problem spot for leaks. Yesterday, I was commissioned to look at a skylight that was, in fact, leaking. They wanted me to figure out what was wrong and how to fix it.

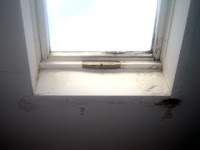
Here's a before picture where you can see where the water has damaged the drywall. You can also see where the window frame is also rotting from water entry:


I removed some of the damaged drywall and it appeared that the water entry was localized to just the window. Then, up on the roof I got a better idea of how the water was getting in. I inspected the flashing and it actually looked pretty tight. The water seemed to be coming through the window itself.

In this picture you can see the gaps around the window seal which is probably how the water was getting in and rotting the wood frame:


Since the window itself was the problem, the homeowner decided that instead of replacing the window, she would rather have me remove it and just reroof this room which is a sunroom on the back of the home. This was less expensive and quicker since we would have had to special order a replacement window to fit this opening.

This particular skylight was mounted so that it was completely above the rafters and basically sat on top of the sheathing. This allowed me to go ahead and do the framing from inside before removing the window. I could then do the tear-off and new roof the next day. I also wanted to take off a little more drywall to make sure we had removed all of the damaged area.


Here's another picture after the framing was done:

To be continued...
-Peter

Tuesday, March 10, 2009

Why I Love My Truck

I've been a fan of Suburban's since my music days when we could find all of the band's gear in the back of my '91 "Blue Ox" or "The Beast". Now I've got a '96 version and today I was reminded why I love this truck when I could fit a stack of Asphalt shingles and an entire sheet of plywood inside with the doors closed.


What's not to love about a truck like that.?

(Ask me sometime and I'll tell you the story of how God totally blessed us with this truck, before I knew I needed it. Isn't that just like Him?! Anyway, it's another reason why I love this truck.)

-Peter

www.CarpentryGuy.com

Monday, March 9, 2009

Cleaning & Exposing Brick

As I started gutting the kitchen we discovered a long forgotten brick chimney in the corner. Originally, the chimney was built to vent some kind of cook stove, maybe coal-burning. It was later covered with plaster and cabinets to hide it completely.

Even a little exposed brick in a kitchen looks great so we decided to clean it up and show it off. I chipped off the big pieces, but there was still quite a bit of plaster residue left to remove. There are lots of differing opinions on the best way to do this. I decided to try muriatic acid to clean off the plaster remnants. I found it at Home Depot, but they only sold it in huge amounts.

I took every precaution I could: large box fans to keep the air venting out the window, protective gloves and safety respirator with replaceable cartridges. (DISCLAIMER: get professional advice for your specific use if you are considering trying this. Various brick types may react differently to the muriatic acid.)

The recommendations that I found were to use about 1 part muriatic acid to 9 parts water (or 10% muriatic acid solution). In the end I probably mixed it a little stronger, but it worked great.

I bought a really cheap disposable paint brush to apply the acid solution and a stiff-bristled wire brush to help clean as well. Just be careful not to splash any of the solution on any unprotected services. I did it when the room was gutted so there wasn't much I could hurt.

I had to do the treatment twice because after the first round the brick still had traces of plaster. I was also doing a very small amount of the chimney because most of it would still be covered with cabinets.

I gave the chimney a day to dry really well and then applied a low-lustre sealer to hold in the remaining dust and protect it from any food stains, etc. (It was near the stove)

It was a little tricky to layout the cabinets & countertop to compensate for the chimney but it was well worth the effort. Here's how the kitchen turned out:


-Peter

www.CarpentryGuy.com

Sunday, March 8, 2009

Master Bedroom Redo

In our first home, a challenging fixer upper in East Nashville, we faced many issues that are quite common to homes that were once neglected duplexes. For example, there were suspended ceilings like you have in an office building throughout half of the downstairs. Above the ceiling tiles were pipes, ductwork, and hidden cracks in the plaster.

The master bedroom was a great example of how unattractive it was, although this picture doesn't show the suspended ceiling or the large stains in the hardwoods. Everything was painted a dirty white color, which I suppose is better than dark pink...


The former closet didn't extend to the ceiling, there was just a flat surface above it that could be used for storage. Sounds nice, but it looked weird and made it really obvious that the closet was not an original feature of the home. I wanted to finish this out with some nice doors to access the storage space and add a small shelf to display knick-knacks or whatever.

I also installed Crown Moulding throughout the downstairs and built soffits to enclose the drainpipes for the upstairs bathroom.

The closet itself wasn't built with any doors on it to hide its contents. I wanted to install bi-fold doors so I built a post in the middle to separate his/hers closet space and trimmed it to match the rest of the doorways. That was fun. I also installed a switch and some low voltage lighting so that the closet wasn't so dark.

Here's a final picture showing all the goodies:


I love seeing old homes come back to life.

-Peter

www.CarpentryGuy.com

Saturday, March 7, 2009

Porch Painting

I love porches, especially if it's attached to an older home. It is one of the great characteristics of homes in the South that isn't as common in the North where the snow would cover them for much of the year.

Anyway, today I was painting a porch in East Nashville to spruce up a home before it is listed for sale. A fresh coat of paint around the front door of your home is always great when you are trying to sell it because that's where the buyers will get their first impression of your home. They are often left waiting here a few minutes while their Realtor unlocks the door, giving them a chance to give it a good look.
Here you can see the difference:

It was a beautiful day to spend outside, although I have a feeling that it will soon be hot and humid again soon...

-Peter

www.CarpentryGuy.com

Friday, March 6, 2009

Painting is All Smiles

Once in while, I'll have time to do a project around our house. A little while ago, I was preparing to paint our nursery and had a little help from my four-year-old, Noah. This was such a great picture that I had to post it:


Whenever I get out my tools, Noah is ready to join in the work. He especially likes the electric screw driver and anything messy like painting or digging. I have to keep an eye on him, but I wouldn't want it any other way!
Working on the house is downright fun for the whole family.
-Peter

Thursday, March 5, 2009

Electrical Mystery Solved!

Today I was working at a friends home who is getting ready to sell her home in Lockeland Springs (East Nashville). I was working on a short list of repairs fixing some rotted wood, painting doors and working on an electrical mystery.

The mystery was to figure out why a countertop GFCI outlet in the kitchen wasn't working at all. In fact, it hadn't worked since it was installed. I took the cover off and tested the wires and found that they were connected properly. This meant that I had to go searching in the attic.

In the attic I found the junction box for these counter outlets and made sure the connections were tight. The wire was hot coming into the box, but the outlet below was still dead. This meant that there was a problem in the wire between the two or there was more happening in the wall that was unseen. It was still very much a mystery!

I got some new 12/2 wire and fished it through the wall into the attic. As I was pulling the 'bad' wire out of the junction box I found the problem.

When the box was installed it was placed directly over a nail that was sticking through the wall from the wood siding outside. The nail was in the perfect place to pierce the wires that were pulled into the box!

If you look closely in the picture you can see the nail in the hole at the bottom of the box where the wires came through.

When I checked the other wires I found another one that was also damaged. The nail had hit two wires and probably caused some heat from the looks of the charred wire sheathing.


I clipped the ends and got rid of the offending nail and put the junction box back together. After some testing, everything was now working correctly.

I love it when mysteries get solved and I get to be a part of it. It was a good day.

-Peter

www.CarpentryGuy.com

Wednesday, March 4, 2009

Cedar Shakes Repair

Yesterday I got to work at a beautiful home in the Hillsboro area of Nashville. The street is full of homes from the 1920's or so with most of them being restored and updated (and quite expensive).

The home's back porch had previously been renovated as finished space inside. The outside was updated, but done poorly and had some gaps that made the kitchen quite drafty. With the temperatures in the 30's lately the homeowner was ready to get it repaired.

It was a fairly straightforward fix that involved taking off the exterior cedar shake shingles and the sheathing. We stuffed R-19 insulation in all the gaps, which were numerous, and covered the wall with 3/4" plywood.

The best part was replacing the Cedar Shakes. I'm not sure why, but I've always loved the look of them, and it was fun to install them. I think my favorite jobs are the ones that people actually see, like the shakes. No one will ever see the quality of my work inside the walls, but they'll enjoy the shakes for years to come.

Later we'll go back and stain them to match the rest of the house and finish the job.

-Peter

Tuesday, March 3, 2009

A Better Tool for Cutting Rigid Insulation

I just noticed a video on the Fine Homebuilding site highlighting the use of a sharpened putty knife to cut rigid insulation. The author, Charles Miller, says that it was the best tool for the job that he’s ever found. It might work, but I’ve got a BETTER idea.

For the studio project I’ve been working on, we installed tons of very dense insulation. Much of it was mineral wool that was quite rigid. I discovered fairly early on that the best way to cut it was with my linoleum knife.

A linoleum knife is one of the tools you buy when you’re installing linoleum and the rest of the time it’s in the toolbox and never used. The large curved blade is extremely sharp and comes to a point so it’s fairly dangerous just to have around. However, it made cutting this insulation a piece of cake.

We used 1” and 2” thick pieces, which the knife handled in one swipe!

I’m not a fan of handling insulation any more than I have to, so having an easy way to cut it really made this part of the project more bearable.

I may have to keep this knife handy. Who knows what other uses I’ll come up with?!

-Peter

www.CarpentryGuy.com

Monday, March 2, 2009

Books to Get You Started

Whenever I want to tackle a new home improvement project or hone my skills, I'll start by reading books or magazine articles. Of course, this is a lousy substitute for someone teaching me, but a well written book often has more detailed and thorough information that are a good foundation to start from.

I've read This Old House magazine for years with great articles and advice my heroes, Norm, Tom, and the crew. Old House Journal is great if you are restoring an old home and trying to retain the appropriate character. They often have informative articles and history about different home styles, etc. I also love Fine Homebuilding because they will actually get into the intricacies of the trade, while some of the others focus more on the design aspects.


Besides magazines, I'm a huge fan of the Creative Homeowner series of books. Whenever I can afford it, I look to see which ones I don't have. Their Plumbing book is always around and is a great reference for when I want to make sure I have rough-in measurements right. Their Architectural Trimwork book was helpful when I was learning the basics of crown moulding, and their House Framing book is excellent and even includes a detailed chapters on building stairs and adding dormers.


These books are full color with lots of great diagrams and pictures showing various steps in the process. They are much more in-depth than a lot of the books I've seen at the home stores. Many have reference sections with code guidelines, etc.


Reading got me started, but I've since learned lots of tricks from pros that I've worked with that save time and insure quality work. There's no substitute for actual work experience, but a good book is a great start when you are learning something new.


-Peter

Sunday, March 1, 2009

Copying Angles- Johnson Sliding T-Bevel

For the studio project I’ve been writing about, I picked up a Johnson Sliding T-Bevel. It’s a simple tool that you can buy on Amazon for a couple bucks plus shipping. (Or, at Home Depot for around $7) Simple, yet indispensable when you need to cut trim at an angle to perfectly fit.

Basically you just place the movable blade on the angle that you are copying and tighten the wing nut. From there you can set your miter saw to match and make sure that your cut piece will fit just right.

It's also small enough that it easily fits in my tool pouch and is there when I need it.

I’m not sure how I lived for so long without this tool. However, at some point I may upgrade to a similar version that also has gauge to tell me precisely what the angle is. That would be helpful quite often as well.

Having the right tools really makes the difference sometimes!

-Peter