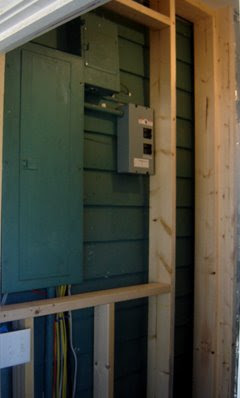
 Today I started a job in Inglewood for a couple who have an incredible older Bungalow from the 1920's. It's a style that I love with all the goodies.
They have just renovated their kitchen with all sorts of upgrades, but still had a short hall by the back door that needed some help. This was where the electrical panels were located, but they didn't look very nice and certainly didn't match the rest of the home. My job was to build a wall to cover it all up and install some large doors so the panels can be accessed whenever needed.
I started by framing the ends of the wall and making sure they were level. Thankfully, the new wall was right under a ceiling joist so I secured the top plate to that with no trouble.
 With the main wall studs in I went to work making the opening for the doors that I'll install. When finished it will be around 3' wide by 4' tall. I framed the opening with 2x4s making sure it was also level, which will be helpful to make sure the doors fit correctly when I get to that.
Next, I built a soffit for the ductwork that ran up to the second floor and hung the drywall. It was less than 16" wide so I could just place studs on either side and drywall over it.
With the drywall up and the first coat of joint compound finished, it's already 100% better. Just wait until I get those doors on!
-Peter
www.CarpentryGuy.com


We havea similar situation in our Illinois house - and it's about the same age as the bungalow you're working on. Be sure and post the picture when it's finished. I'm needing ideas!
ReplyDelete